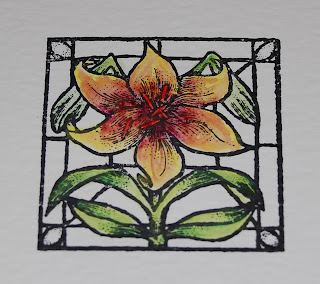
I find them so versatile and in the right hands (not mine of course!) the results can be fantastic!!!
You don't have to spend a fortune on buying them, one set of mine came from WH Smith. You need a few brushes of different thicknesses - I have three; fine, medium and broad. I tend to use waterbrushes (the type that has a water chamber for the handle) but often use them simply with a pot of water. I say a pot but I keep two by my side; one for wetting the brush and the other for cleaning, that way you don't get any interference of colours.
Remember that water and paper/card don't normally mix too well, so remember to be sparing with the amount of water that you apply. You can always add a little more to blend your colours but you can't take it away very easily and still achieve a nice finish.
You can watercolour stamped images, backgrounds or even peel offs if you wanted to. I'm going to show you a few photos of how I've coloured in some stamped images. I've used Stazon ink as it's quick drying and not water based so won't run into your pattern.


Using your lightest colour first, colour in your image, gradually changing pencils and colours until your image is complete and the darker colours provide your shadows. You don't have to make sure that you colour every little bit of your paper as that's what the water will do for you.

Once you're happy with your colouring, wet your brush with CLEAN water and wipe against the edge of the water pot to remove most of the water from it. Starting with the lightest colour, gradually move the brush around the pencilled area until it's covered. I then move to the shaded area I'm working in as it normally contains colours that I need to blend together and the brush doesn't have to be cleaned. Colour the darkest area first, gradually moving the brush into the lighter area to blend the two colours. Remember not to make an obvious line but to keep the movement 'fluid' between the areas.

If you're then transferring to a different area and colour, remember to clean your brush. Repeat the above process until your image is complete, then allow to dry thoroughly.


You can use Twinkling H2O paints much the same way. As these are a cake of paint, I find you need to add quite a lot of water to start off with and let them stand for a few seconds to soften the surface. The more water used on H20's the more translucent the image, the less water the darker and more intense the colour.
2 comments:
What a wonderful tutorial Rosie...Iv been catching up an d your videos are `Fantastic` love them..
I must dig out my watercolours..TFS
Have a great week:) X
Nice toot Rosie. I love my watercolour pencils.
Post a Comment